Menu
Using a platform like Warrior Plus has many advantages to both the vendor and buyer, click this link to get detailed information of the features and benefits of using the system.
The following 3 videos provide a simple walk through and you can find detils to refer to below if you need some help in setting up
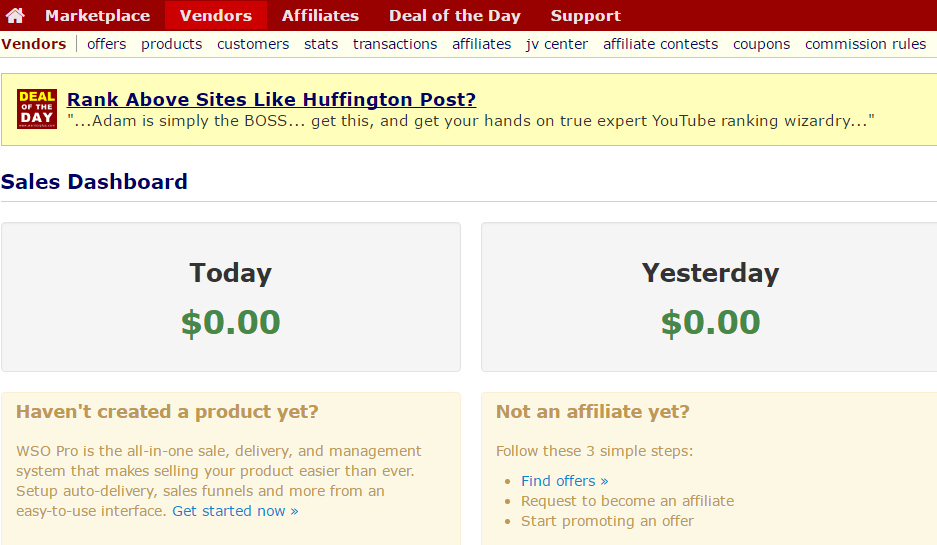
Click “Vendor” and the screen below is what you see.
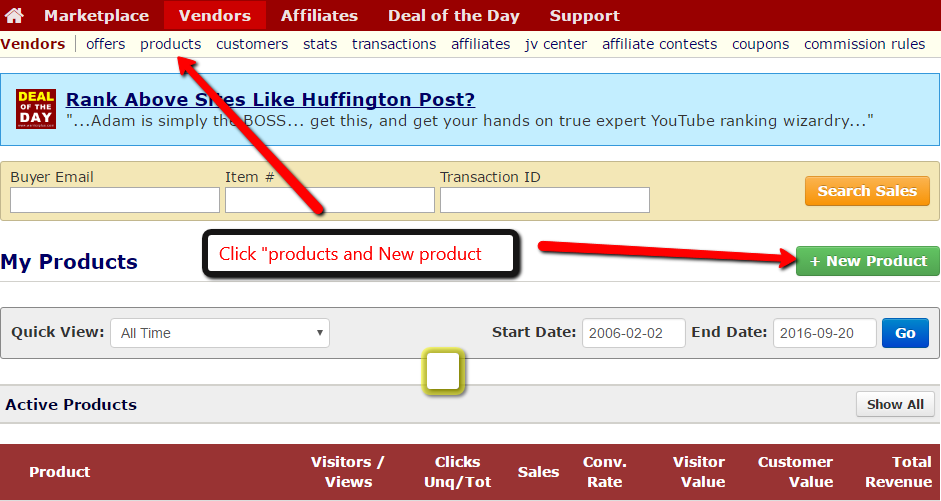
Click to “Products” and then “New Product.
It is a good idea to open notepad or word and add all of the information you will require to create the products and offer as follows
If you want to deliver the product in a zip file click choose file and select the file. Warrior plus will deliver this file automatically in the back office and by email.
You should always try to create a download page however, this provides you with the option to add bonus materials and other products for sale.
Click the green button “PayPal account” and you will be directed to your PayPal account, log in and you will see this screen
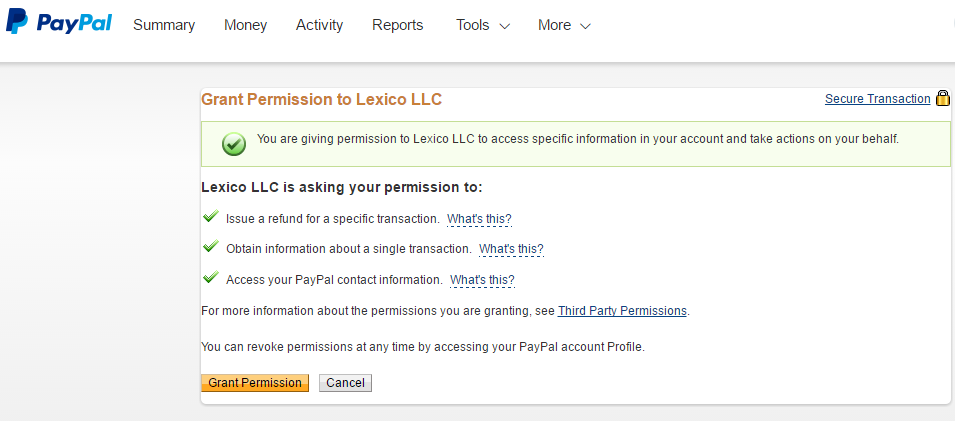
Click to “Grant Permission” and you have set up the payment processor.
If you have an autoresponder click the link and select the service you are using by clicking + Service
This is the page you will see.
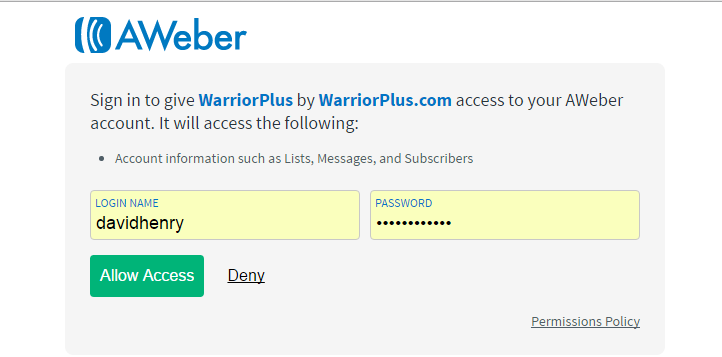
You will need to authorise Warrior Plus to add customers to the list by clicking “Allow Access”
If you have a membership site you can connect this to Warrior Plus using API, details of this are available in the support of section of Warrior Plus
Custom Integration (advanced) can be left blank at this stage and is not required to set up a basic sales funnel
Enter a commission level you are happy to pay any affiliate who want to promote your offer. The payment and admin is completed by Warrior Plus so no downside to not setting this up. To get more detailed information please visit the support section in Warrior Plus
Make sure Deal of the day is on and you add access to the download page. This can result in hundreds of additional sales generated by Warrior Plus promoting the offer for 1 day
Set product status to open and click to save.
The product is now set up and available to be added to an offer
Replicate this process for all of the products you wish to sell as part of this offer. These will include upsell products and down sell products and once you know your way around you can create powerful deep funnels for maximum ROI
Complete the fields which are self-explanatory
Set “Public” to off at the set up stage, this can be activated once the offer has been checked and ready for launch
When you have completed the offer set up it is time to add the products.
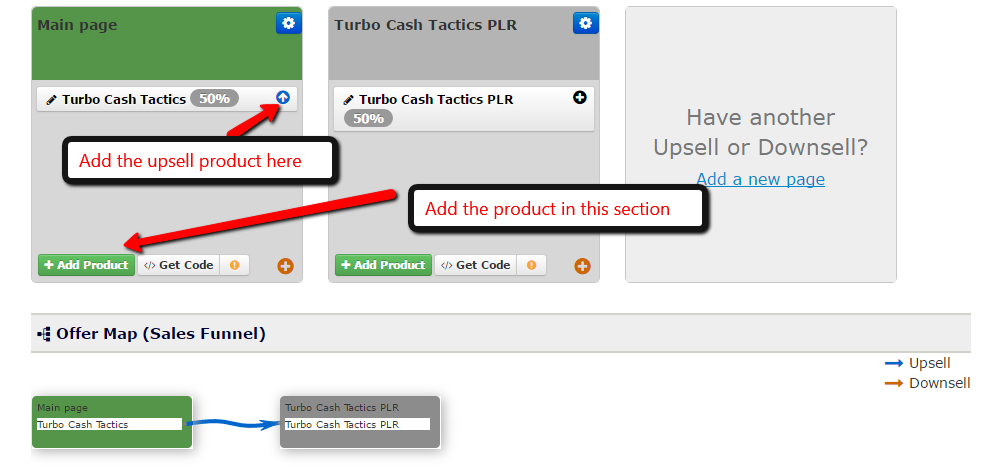
Click the link and add the product
Click the link to add the upsell
Once you have added both products click on “Get code”
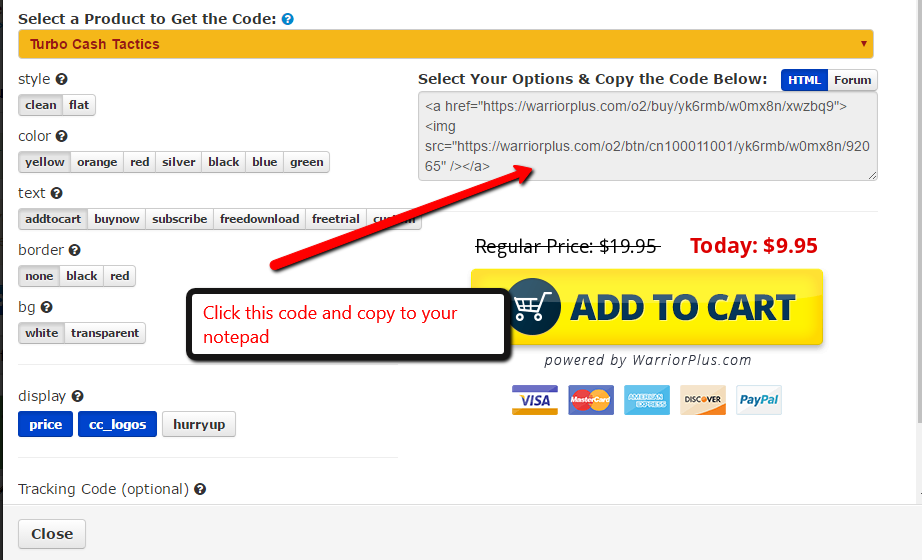
You can create different colours and images in this section, once you have done this click the code and copy to your notepad
If you are using the Warrior Plus button simply paste the code below into the sale page source code where you want the button to appear.
<a href=”https://warriorplus.com/o2/buy/yk6rmb/w0mx8n/xwzbq9″><img src=”https://warriorplus.com/o2/btn/cn100011001/yk6rmb/w0mx8n/92065″ /></a>
If you want to use a button image like we do in the video you need to copy this section between to ““
So this is the code we copy and paste in to the sales page.
https://warriorplus.com/o2/buy/yk6rmb/w0mx8n/xwzbq9
Open the sales page in Kompozer and locate the PayPal button code we added previously and replace with this new code.
Save this page and upload to your server using FileZilla.
Once you have activated the offer and checked all of the pages are accessible it is time to submit the offer for approval.
Once approved the offer will be live in the market place and you are open for business.