Menu
Paid Membership Pro is a fantastic bespoke WordPress membership plug-in that provides an out of the box solution to setting up your first membership site.
You can set up unlimited membership levels and provide restricted access to pages, posts, categories, videos, forums, downloads, support and much more.
Paid Memberships Pro is flexible enough to fit the needs of almost all online and offline businesses. It works great out of the box, but is easy for developers to customize to fit your needs.
Please Click this link to access the download page.
You are signing up for the FREE DOWNLOAD Option. The other 2 options you will see on this page are a “done for you installation” and “1 year support” which you can take advantage of if you wish but are not required.
You will need to create an account and enter your email and main site URL and your download installation link will be on the next page. Please click “Download Paid Membership Pro Plug-in”
From your dashboard select “Plugins”
Select “add new”

Click “Upload” and locate the plugin you saved.
Click “Install” when you find the plugin zip file
Once installed click to “activate” the plug-in, this is what you should see once activated

On the dashboard, go to Memberships and select Membership Levels.
Name: The name of your Membership level (public)
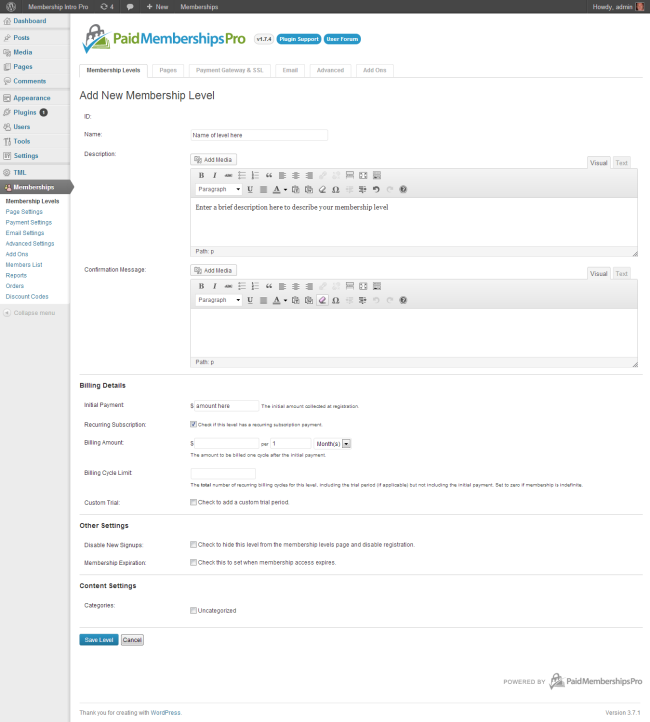
Important: At least one membership level must be open to signups (“Allow Signups” = Yes) or your customers will be redirected to your membership levels page when they try to register or checkout.
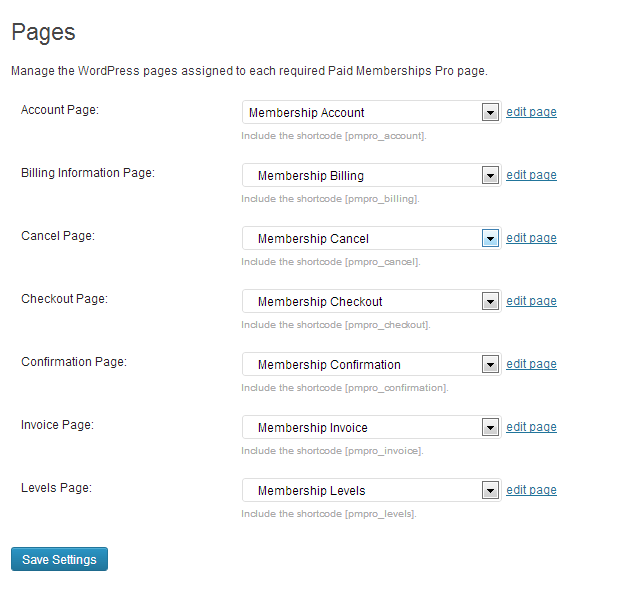
The next Step is to set up some pages that Paid Memberships Pro needs to get the job done.
Click the Pages Tab. (From the dashboard, go to Memberships and select Page Settings)
This step sets the WordPress pages assigned to each required Paid Memberships Pro page.
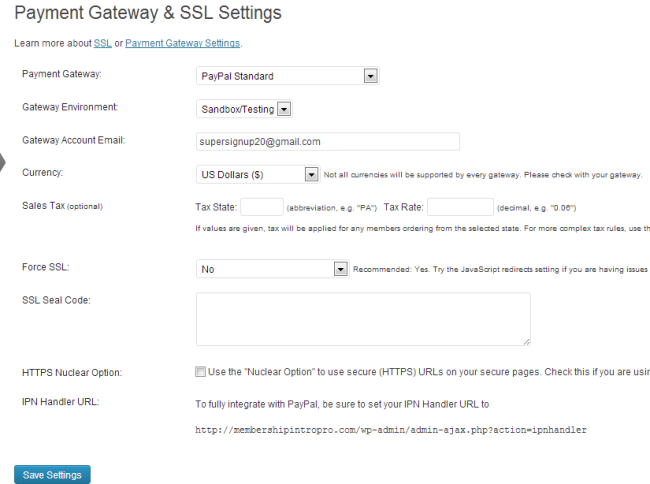
The plugin supports 10 different payment gateways. For ease of use Paypal is a good choice to select.
Select “Payment Settings”
Select “Paypal Standard” unless you have any other version set up
Select “sandbox” to test and when you have tested the set up swith this to “live production”
Select the currency you wish to use for billing
Sales tax optional (Please check this out with your accountant)
Force SSL select “No”
IPN Details If you wish to connect your membership site directly to Paypal this URL is required.
Click “Save”
If you wish to use any other payment please refer to this page for help
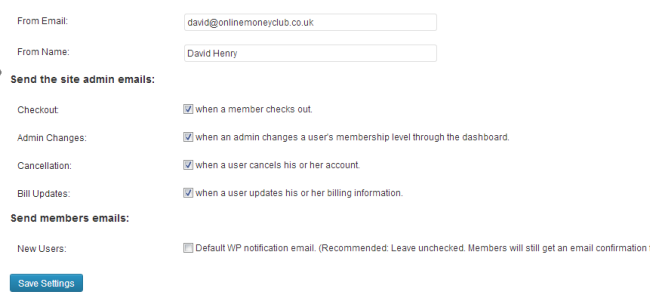
Click the Email Tab. (From the dashboard, go to Memberships and select Email Settings)
Click the Advanced Tab. (From the dashboard, go to Memberships and select Advanced Settings)
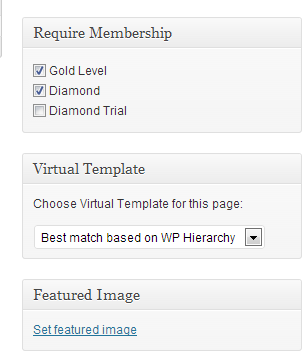
To protect any page or post on your website just requires you to select the level you wish to view the content. If you have multiple levels and you want all your members to view the content make sure you select all the levels in the tick box which is located at the bottom right of your page or post.
If you want just 1 level to access just select the level you require.
Please Note:
You must select a level on all pages to grant access.
After you have successfully set up the plugin, try the experience from start to finish from your user’s perspective.
Navigate to a members-only piece of content, try a blog post in a locked-down category.